Kaish Capture Manual
Record a reliable live source, add simple markers without interrupting preview, review the finished game, and hand clean work to Kaish App or Analyst.
1. Install and unlock Capture
- Download the current public Kaish Capture DMG.
- Drag Kaish Capture to Applications, eject the DMG, and open the Applications copy.
- Sign in with the account assigned Capture access.
- Allow Camera, Microphone, Local Network, and folder access only as the chosen source and workflow require them.
Capture requires signed-in access for protected capture, review, save, and export commands while preserving existing local packages. If access behaves unexpectedly, sign in again and contact support before using customer work.
2. Choose the video source
| Source | Use it for | Important limit |
|---|---|---|
| Compatible input-capable Blackmagic DeckLink / UltraStudio | Direct HDMI or SDI ingest and the protected Bench DVR path. | Requires Desktop Video, a supported input device, matching signal format, and exclusive access. Output-only UltraStudio Monitor hardware is not a capture source. |
| FaceTime, USB/UVC, or Continuity camera | Direct camera recording without a Blackmagic box. | Confirm the separate audio source and run a short recording test. |
| OBS Virtual Camera | Browser capture, network sources, graphics, or mixed scenes routed through OBS. | Start Virtual Camera in OBS; do not press Start Streaming unless an internet stream is also required. Bench DVR is not available on this path. |
Capture refreshes compatible source choices when Setup opens or sources change. Select the named source explicitly; the Blackmagic default label is a route, not proof that a device is connected.
3. Use OBS for the current no-hardware workflow
- In OBS, create a scene and add the browser, camera, capture card, or network input.
- Confirm OBS canvas and frame rate.
- Choose Start Virtual Camera.
- In Capture Setup, choose OBS Virtual Camera.
- Select the audio device separately if OBS Virtual Camera does not expose the required audio.
- Record one minute, Stop, reopen the result, and check picture and sound.
4. Prepare Blackmagic ingest
- Install the supported Blackmagic Desktop Video version and restart when required.
- Confirm UltraStudio or another supported DeckLink device appears in Desktop Video Setup.
- Connect HDMI or SDI and match the source resolution and frame rate.
- Close Media Express and any other app holding the device.
- Choose the direct Blackmagic route in Capture and confirm live video and audio.
A device appearing in Desktop Video does not guarantee a correct signal. Test the exact cable, switcher/camera output, format, and recording destination.
5. Create the session before recording
- Choose New Session.
- Enter a clear session name and optional opponent or event.
- Choose the sport profile, recording quality, and destination folder.
- Confirm source, format, audio, storage, remaining capacity, and Ready state.
- Keep the destination drive connected and awake.
Name test sessions clearly. Never record a real game into an old test package or a nearly full system drive.
6. Record and mark the game
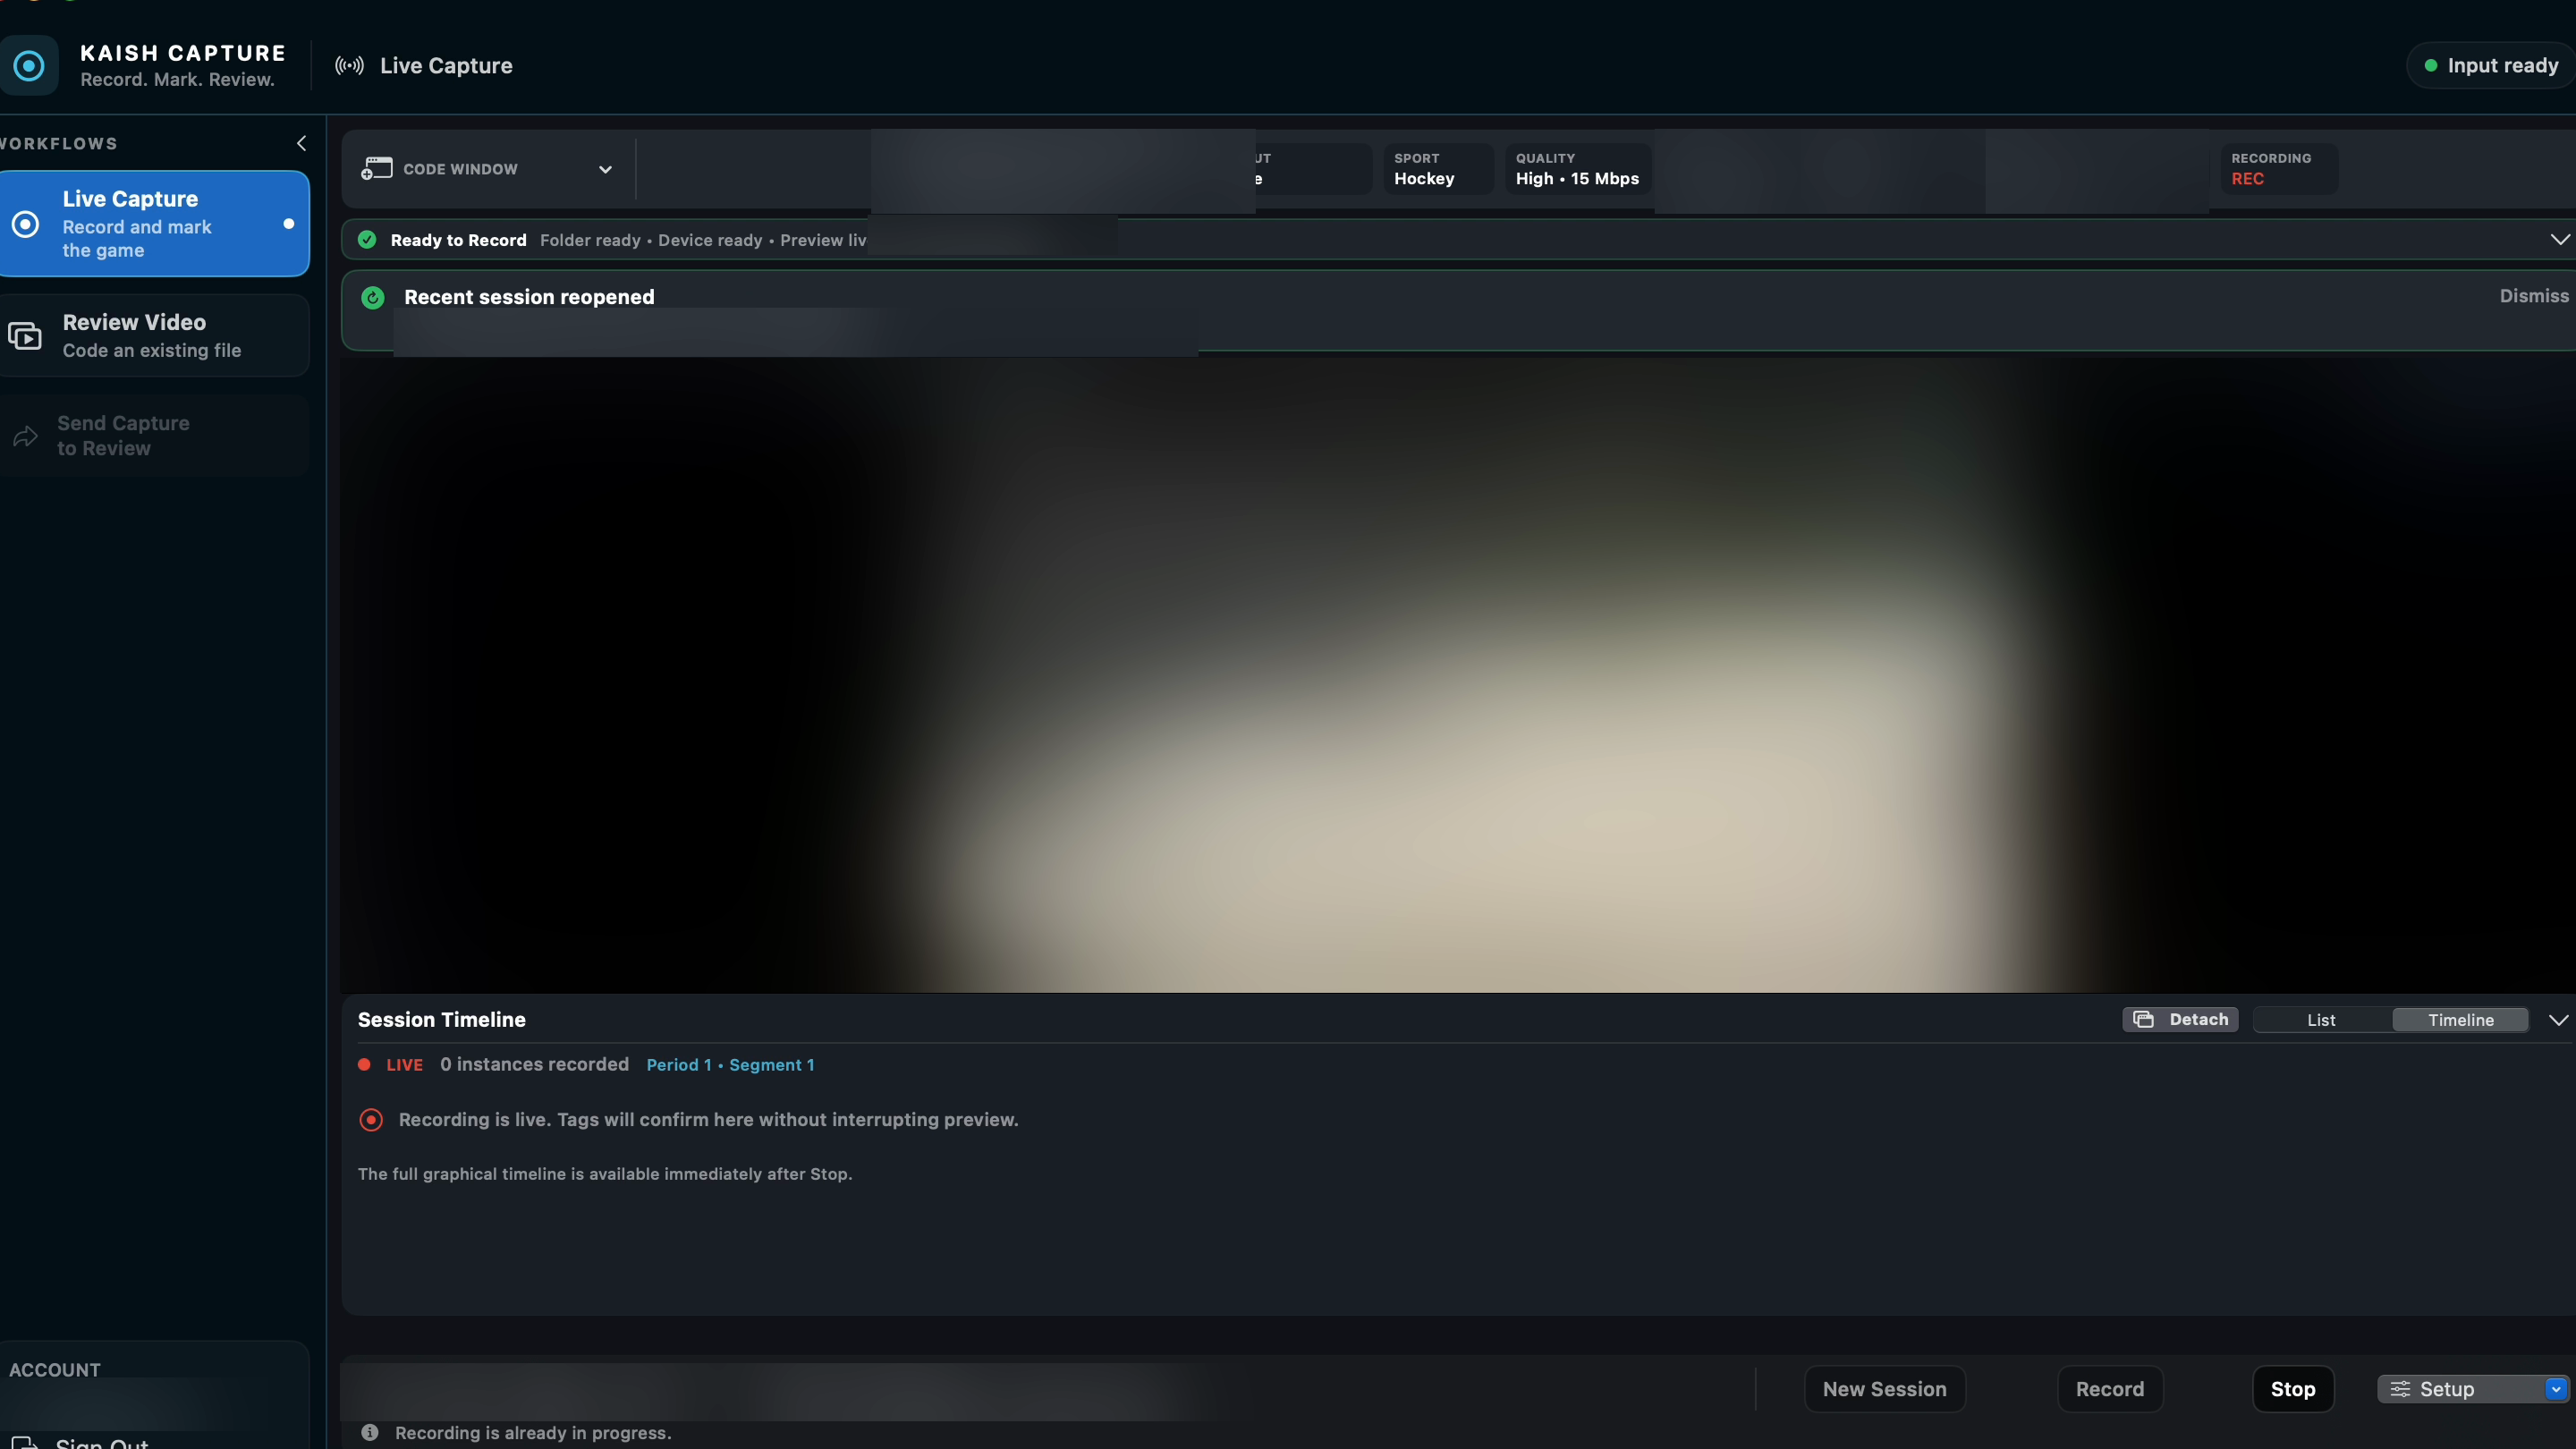
- Press Record and confirm elapsed time and file size advance.
- Open the Code Window and confirm its target is Live Capture.
- Use instant markers for point events and manual markers for start/end events.
- Apply lead and lag only when pre-roll or post-roll is required.
- Watch dropped-frame, storage, signal, and audio status during the session.
- Press Stop and wait for finalization before moving files or disconnecting storage.
Marker creation and clip preparation are designed to stay off the live-preview path. If a click visibly freezes preview, preserve the package and report the source, format, lead/lag, and exact build.
7. Record periods or segments safely
- Stop and finalize the current segment.
- Start the next segment within the same session when it belongs to the same game.
- Confirm the new movie filename and continuous session timing.
- Do not rename, move, or delete a segment while the session is open.
Stopped time is not part of recorded-video time. Imported period movies can also be appended in their intended order where the current postgame workflow offers that action.
8. Use Bench DVR only on the supported path
Bench DVR uses the direct Blackmagic capture backend. OBS and generic AVFoundation camera sources can record normally but do not provide the protected DVR stream.
- Enable DVR before the Blackmagic recording begins.
- Wait for the first finalized ready chunk.
- Open DVR Review on Mac or connect an iPad running Kaish App on the same LAN.
- Replay ready media while the main preview remains live.
- Return to live before resuming normal bench use.
Pairing may need to be repeated after the DVR server restarts. Be ready to enter the new six-digit code.
9. Review the completed session
- Open Review Video or the saved
.kaishcode. - Confirm every segment and the full timeline duration.
- Play an early, middle, and late marker clip.
- Add notes or labels needed for handoff.
- Relink missing external media through the file or parent-folder picker, then save.
A current portable .kaishcode package may contain its media. Legacy or reference-style files may keep external paths and require relinking.
10. Code an existing video
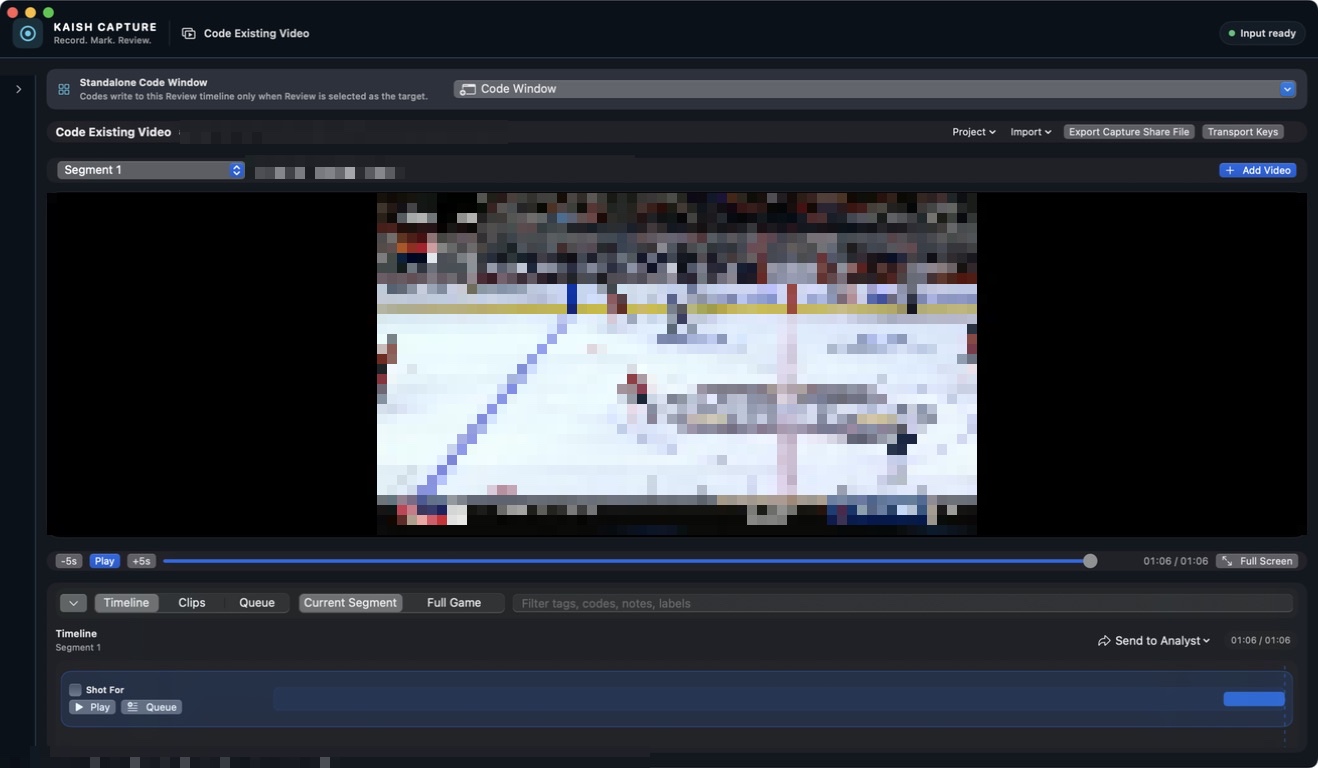
- Choose Review Video and add one movie or ordered segment movies.
- Open the intended Code Window and target Review Video.
- Import supported XML or JSON review data only after media order and duration are correct.
- Play representative rows and verify clip boundaries.
- Save an editable
.kaishcodepackage before exporting a handoff. - If saved media moved, use the visible relink action, verify the active segment, and save again.
The editable Review package and the share file serve different purposes: .kaishcode preserves Review work for Capture or Analyst, while Capture Share File JSON carries markers and video references into Kaish App.
11. Combine compatible Kaish timelines
- Choose File → Combine .kaishcode Files….
- Add two or more compatible files from Capture, Analyst, or another supported Kaish workflow.
- Arrange them in the intended game order.
- Save a new combined package; do not overwrite an original.
- Open the output and verify segment order, duration, tags, and media.
There is no intended two-file limit. Combination should create a new result and leave every source file unchanged.
12. Hand work to App or Analyst
Send a Review scope to Analyst
- In Review Video, switch to the intended Current Segment or Full Game scope.
- Select row checkboxes for a row-based handoff, or select individual clips for a clip-based handoff.
- Open Send to Analyst and choose Selected Rows…, Selected Clips…, or Complete Timeline….
- Choose a destination for the portable
.kaishcode. Capture includes only the requested tags and copies the available source media needed by the package. - Open the saved package in Analyst and verify segment order, continuous timing, notes, labels, and representative clips.
Send Capture markers to Kaish App
- Use Export Capture Share File (JSON) after the session or Review project is ready.
- In Kaish App, import that Capture Share File into the correct finalized game and segment, or use the supported New Game import.
- Attach or relink the source video if the receiving device cannot resolve it, then verify several tags.
A Capture Share File JSON is not an Analyst .kaishcode package. Keep the original Capture project and media until the intended receiver opens the handoff and representative clips play.
13. Manage storage and cleanup
- Record to a tested local or external drive with comfortable free space.
- Keep active packages, recovery sidecars, and movie files together.
- After verification and backup, archive old sessions to external storage.
- Remove old installers and duplicate test exports only after confirming the current installer and package copies.
14. Troubleshoot without damaging the session
Black or missing picture
Reselect the source, match the source format, confirm permissions, and close any app already holding the device.
Audio missing
Select the intended audio input separately and make a short recording; a virtual-camera picture does not guarantee embedded audio.
Preview hitches on tags
Stop after a safe sample, keep the package, and report source, format, lead/lag, storage, and build.
Recording will not start
Check session name, destination, free space, source readiness, authorization, and whether an old session is still finalizing.
Media will not reopen
Verify finalization completed, then relink the package or parent media folder without moving the originals.
DVR unavailable
Confirm the direct Blackmagic route, enable DVR before Record, wait for ready media, and test the same LAN.
15. Know the current platform limits
- Only direct Blackmagic capture supports the protected Bench DVR path.
- OBS can route SRT, NDI, browser, and other supported sources into Capture; Capture receives OBS’s composed output.
- Use a backup venue recorder.
- Pair again after the DVR server restarts.
- Hardware depends on drivers, cabling, source format, macOS permissions, and storage performance.
Game-day readiness checklist
- Current Capture release and signed-in account.
- Chosen source, picture, audio, and format verified.
- Destination drive and free space verified.
- One-minute recording reopens and scrubs.
- Multiple tag clicks do not hitch live preview.
- Stop/finalize and postgame clip playback pass.
- If used, Blackmagic DVR and current App Store iPad pairing pass on the venue LAN; the fallback OBS or local recording path is ready.